

Can You Paint On Plaster
If you’ve ever wondered about painting on plaster, you’ve come to the right place!
In this article, we will explore the different types of plaster, the surfaces you can paint on, the types of paint you can use, the preparation needed before painting, the steps to paint on plaster, and some helpful tips for a successful painting project.
Whether you’re a novice or an experienced painter, this guide will provide you with all the information you need to achieve a beautiful finish on your plaster surfaces.

What Is Plaster?
Plaster is a versatile building material that has been used for centuries in construction and decoration.
Its composition typically consists of a mixture of lime, sand, and water, creating a paste that can be applied to walls, ceilings, and other surfaces. Throughout history, plaster has played a crucial role in adding structural support to buildings, forming protective coatings, and enhancing aesthetic appeal through intricate designs and ornamental details.
Today, modern applications of plaster extend beyond traditional uses, with innovations such as lightweight plasterboards for interior walls and ceilings, soundproofing materials, and sculptural elements in contemporary architecture. The versatility and durability of plaster continue to make it a valuable material in various construction projects.
What Are The Different Types Of Plaster?
Various types of plaster are available for different purposes, including lime plaster, cement plaster, and gypsum plaster.
Each type of plaster has its own unique characteristics and compositions that contribute to its specific uses in construction.
- Lime plaster, for example, is known for its breathability and flexibility, making it ideal for historic restoration projects.
- On the other hand, cement plaster is valued for its strength and durability, making it suitable for exterior surfaces exposed to harsh weather conditions.
- Gypsum plaster offers excellent fire resistance and is commonly used for interior wall finishes due to its smooth appearance.
Understanding the advantages, disadvantages, and ideal applications of each type of plaster is essential for achieving the desired results in building projects.
What Surfaces Can You Paint On Plaster?
Paint can be applied to a wide range of surfaces, including plaster walls, ceilings, and decorative plasterwork.
When painting plaster surfaces, it is crucial to consider the preparation needed based on the type of plaster. For fresh plaster, ensure it has fully cured before painting to prevent peeling or cracking.
In the case of older or previously painted plaster, any flaking paint should be removed and the surface cleaned thoroughly. The texture of the plaster can also affect paint application; smoother surfaces may require less paint, while textured surfaces may need extra coats to achieve a uniform finish.
Aesthetic considerations such as color choice and sheen level play a significant role in enhancing the beauty of plaster surfaces with paint.
Can You Paint On Fresh Plaster?
Painting on fresh plaster requires specific techniques and considerations to ensure proper adhesion and a durable finish.
- One crucial step when painting on fresh plaster is to properly seal the surface before applying any paint. This helps to prevent the absorption of moisture, which can lead to peeling and flaking over time.
- To seal fresh plaster, use a primer specifically designed for porous surfaces to create a barrier between the plaster and the paint. It is important to choose a high-quality paint that is suitable for plaster surfaces to ensure optimal adhesion and longevity.
- Select paints labeled as suitable for masonry or new plaster, as they are formulated to adhere well and withstand the alkalinity of fresh plaster.
Can You Paint On Dry Plaster?
Painting on dry plaster allows for easier application and better adhesion, provided the surface is properly prepared and primed.
Surface cleaning is crucial to remove any dust, dirt, or residues that can affect the paint’s ability to adhere. Repairing any cracks or imperfections in the plaster ensures a smooth and seamless finish. Priming the surface before painting is essential to enhance the paint’s durability and prevent it from peeling or flaking over time. These steps not only improve the overall quality of the painted surface but also contribute to the longevity of the paint job, making it a worthwhile investment in the appearance and maintenance of your space.
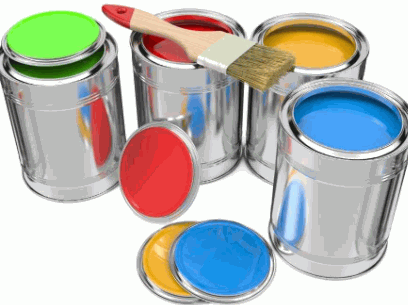
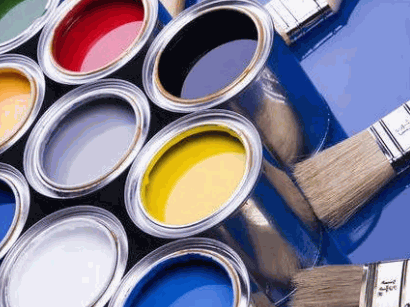
What Types Of Paint Can You Use On Plaster?
There are several types of paint suitable for plaster surfaces, including latex, acrylic, and oil-based paints.
Latex paint is a popular choice for plaster surfaces due to its flexibility, quick drying time, and ease of cleaning with water.
Acrylic paint, on the other hand, offers excellent adhesion and durability, making it a great option for high-traffic areas.
Oil-based paints are known for their rich pigmentation and long-lasting finish, perfect for creating a luxurious look on plaster walls.
Each type of paint also comes in a wide range of colors, allowing homeowners to easily achieve the desired aesthetic for their space.
When it comes to texture, latex, and acrylic paints can be applied smoothly for a contemporary look, while oil-based paints offer a more textured finish for added depth and dimension.
Latex Paint
Latex paint is a popular choice for painting plaster due to its quick drying time, easy cleanup, and versatility in color options.
Latex paint offers exceptional durability on plaster surfaces, making it a reliable option for high-traffic areas in homes or commercial spaces. Its flexibility allows for easy application, whether you prefer brushing, rolling, or spraying methods. This type of paint also adheres well to various plaster textures, ensuring a smooth and uniform finish. Whether you’re working with textured, smooth, or rough plaster surfaces, latex paint provides a consistent and long-lasting coat that enhances the overall aesthetics of the space.
Acrylic Paint
Acrylic paint offers excellent adhesion to plaster surfaces, a wide range of colors, and the ability to create textured finishes.
This versatile paint medium effortlessly bonds with plaster, ensuring a durable and long-lasting finish that resists peeling or flaking over time. With an extensive palette of vibrant hues, artists and DIY enthusiasts can easily find the perfect shades to bring their creative visions to life. Whether aiming for a gritty, tactile texture or a smooth, polished look, acrylic paint on plaster provides endless opportunities for experimentation and artistic expression, making it a popular choice for various projects.
Oil-based Paint
Oil-based paint provides a durable and glossy finish on plaster surfaces but requires longer drying times and proper ventilation during application.
In addition to its durability and glossy finish, oil-based paint is known for its ability to create a smooth and even coat on plaster walls, making it ideal for high-traffic areas that may be prone to scuffs and marks.
It is important to note that oil-based paints emit strong fumes during application, necessitating proper ventilation to ensure safety.
Cleaning up after using oil-based paint requires mineral spirits or paint thinner, as water alone will not effectively remove the paint from brushes and tools.
What Preparation Is Needed Before Painting On Plaster?
Proper surface preparation is essential before painting on plaster to ensure adhesion, durability, and a professional finish.
This process typically involves several key steps to achieve the desired results.
- The first step is cleaning the plaster surface thoroughly by removing any dust, dirt, or debris using a damp cloth or a vacuum cleaner.
- Next, inspect the surface for any cracks or imperfections, which should be repaired using a suitable plaster patching compound.
- Once the repairs are complete, applying a high-quality primer or sealer is crucial to promote proper adhesion of the paint and to enhance the overall finish quality.
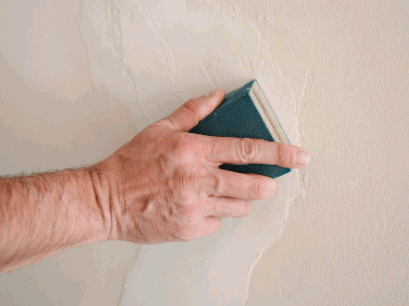
Cleaning The Surface
Cleaning the plaster surface before painting removes dust, dirt, and debris that can affect paint adhesion and finish quality.
A clean surface is essential to ensure that the paint adheres properly to the plaster, creating a strong bond that prevents peeling and flaking over time. By eliminating impurities, the paint can bond more effectively, leading to a longer-lasting finish that maintains its vibrancy and appeal. A well-prepared surface not only enhances the aesthetic appeal of the painted area but also makes maintenance easier in the long run, as it reduces the likelihood of issues such as chipping or cracking.
Patching And Repairing Any Damaged Areas
Patching and repairing damaged areas on plaster surfaces is crucial to achieving a smooth and uniform paint finish.
- To start the repair process, begin by cleaning the damaged area to remove any loose debris or dust using a brush or vacuum.
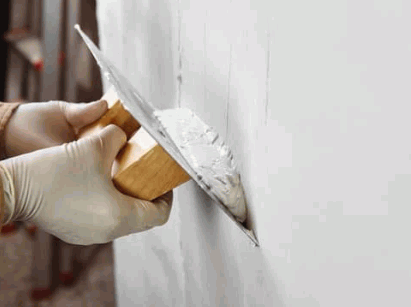
- Next, use a putty knife to apply a layer of patching compound over the crack or hole, ensuring it is filled and leveled with the surrounding surface.
- Allow the compound to dry completely before sanding it down to create a smooth finish.
- Repeat the process if necessary for deeper cracks or holes.
- Once the surface is smooth, prime it before applying the final coat of paint for a flawless look.
Find out more: How To Prevent Plaster Walls From Cracking
Priming The Surface
Applying a primer on plaster surfaces helps improve paint adhesion, uniformity of color, and overall finish durability.
Priming plaster before painting acts as a crucial preparatory step that creates a strong bond between the surface and the paint. Without proper priming, the paint may not adhere well to the plaster, leading to peeling and flaking over time. The primer also helps seal porous areas on the plaster, promoting better coverage and a smoother, more professional-looking finish. By enhancing adhesion, a primer ensures that the paint stays intact for longer, preventing premature wear and maintaining the beauty of the painted surface.
What Are The Steps To Paint On Plaster?
Painting on plaster involves a series of steps, including material preparation, base coating, paint application, and finishing touches for a polished result.
- To start the process, gather the necessary materials such as paint brushes, rollers, painter’s tape, primer, and your chosen paint colors. Ensure that the plaster surface is clean, dry, and free of any dust or debris.
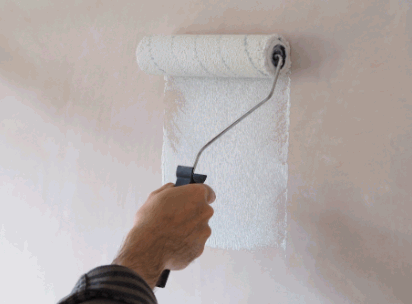
- Begin by applying a base coat of primer to help the paint adhere better to the plaster. Once the primer has dried, you can start applying your desired paint color in even strokes, working from top to bottom.
- For optimal coverage and a smooth finish, consider applying multiple thin coats of paint, allowing each layer to dry completely before adding the next.
Prepare Your Materials And Work Area
Before painting on plaster, gather the necessary materials, set up your work area with proper ventilation and lighting, and ensure your surfaces are clean and ready for painting.
- When preparing to paint on plaster, you will need materials such as primer, paintbrushes, rollers, paint trays, painter’s tape, and a drop cloth to protect your surroundings.
- It is essential to have a clean and organized workspace to prevent any accidents or spills. Make sure the area is well-ventilated to avoid inhaling fumes from the paint. Don’t forget to wear protective gear like goggles and gloves to keep yourself safe while working with painting tools.
Following these best practices will help you achieve a professional and successful painting project on plaster surfaces.
Apply A Base Coat
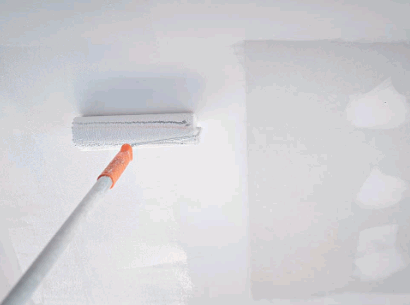
Applying a base coat on plaster helps create an even surface, enhances paint adhesion, and improves color consistency across the wall or ceiling.
The primary purpose of the base coat is to provide a foundation for the subsequent layers of paint, ensuring better durability and longevity of the finish.
To achieve a smooth and uniform surface, it’s essential to apply the base coat evenly using a roller or brush in consistent strokes.
Properly preparing the surface by cleaning and priming it before applying the base coat can further enhance adhesion and prevent peeling or cracking.
Selecting the right base coat color that complements the final paint color can help maintain color consistency and avoid any blotchy or uneven appearance.
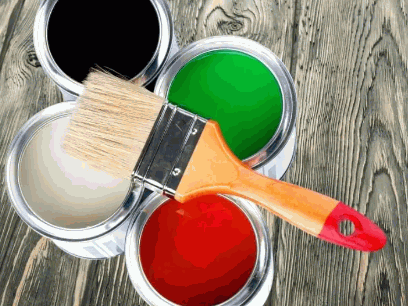
Apply The Paint
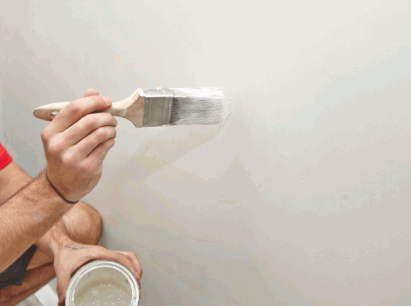
The paint application on plaster can be done using brushes, rollers, or sprayers, ensuring even coverage and a consistent finish.
- Brushes are commonly used for detailed work and cutting edges, providing precision and control over the application.
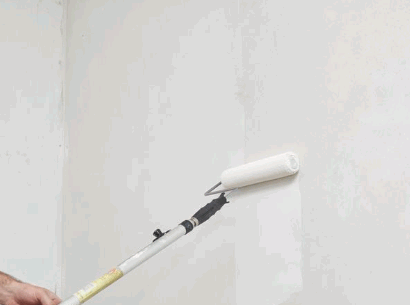
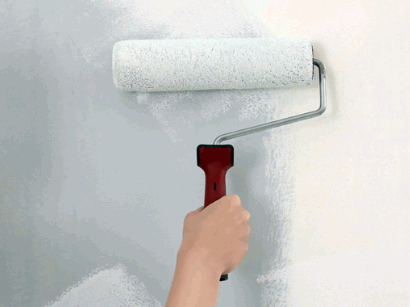
- Rollers, on the other hand, are great for large surface areas, allowing for quick and even distribution of paint.
- Sprayers are ideal for achieving a smooth, professional finish on textured surfaces.
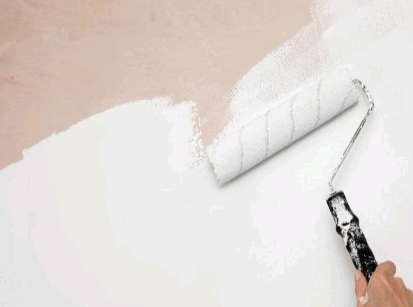
To ensure consistent coverage, it is important to apply paint in a crisscross pattern, blending each stroke to avoid lap marks. By choosing the right tool and applying the paint correctly, you can achieve a seamless and high-quality finish on your plaster surfaces.
Let The Paint Dry And Apply A Second Coat If Needed
Allowing the paint to dry completely before applying a second coat ensures a durable and long-lasting finish on plaster surfaces.
Different types of paint have specific drying times that vary depending on factors such as temperature, humidity, and the type of surface being painted. It’s crucial to follow manufacturer recommendations for drying times to prevent issues like peeling or cracking.
To determine if a second coat is needed, check for any areas where the first coat may have dried unevenly or left visible streaks. Applying a second coat can help achieve a more uniform look and enhance coverage.
For a smooth and professional finish, always use high-quality paint brushes or rollers and work in well-ventilated areas to allow for proper drying.
What Are Some Tips For Painting On Plaster?
For a successful painting project on plaster, consider using high-quality brushes or rollers, working in small sections, and applying light coats of paint for optimal results.
In addition to using the right tools and applying paint methodically, it’s crucial to prepare the plaster surface properly before starting. Begin by cleaning the walls thoroughly to remove any dust or debris, and consider using a primer specifically designed for the plaster to ensure proper adhesion of the paint. When painting on plaster, maintaining consistent pressure while brushing or rolling can help achieve an even finish without streaks or patches. Remember to allow each coat to dry completely before applying the next layer to prevent any bubbling or peeling.
Use A High-quality Paintbrush Or Roller
Investing in high-quality paintbrushes or rollers ensures smoother application, better coverage, and a more professional finish on plaster surfaces.
Quality tools play a significant role in achieving a seamless painting process on plaster walls, leading to improved overall finish consistency and durability. The precision engineering and design of premium brushes and rollers allow for greater control and ease of application, reducing the chances of streaks or uneven coverage. This not only enhances the aesthetic appeal of the painted surface but also contributes to its longevity by ensuring a more durable and resistant finish. By using the right tools, painters can elevate the quality and longevity of their work.
Work In Small Sections
Painting in small sections on plaster allows for better control, and even coverage, and minimizes the risk of visible brush or roller marks.
Working in manageable sections when painting on plaster offers a myriad of advantages beyond just aesthetics. By breaking down the painting process into smaller increments, you can focus on perfecting each section, ensuring a consistent finish throughout the entire surface. This approach also helps in maintaining a steady pace, preventing rushed applications that could lead to errors or uneven distribution of paint. In addition, dividing the work into sections enables you to maintain quality control by easily identifying and correcting any issues that may arise during the painting process.
Use Light Coats Of Paint
Applying light coats of paint on plaster surfaces helps prevent drips, and runs, and ensures better adhesion between layers for a professional-looking finish.
This technique of layering paint thinly not only enhances adhesion but also allows for better control over the consistency of the finish. Thin layers dry more evenly, reducing the risk of uneven patches or streaks in the final result.
By building up the paint gradually, the surface can be smoothly textured, creating a more visually appealing and seamless look. The application of thin coats also facilitates better coverage and helps to avoid the common issue of paint buildup that can detract from the overall aesthetic of the painted surface.
Clean Up Properly After Painting
After painting on plaster, proper cleanup of tools, surfaces, and work areas is essential to maintain the longevity of your painting equipment and ensure a tidy finish.
- When wrapping up your painting project, begin by carefully cleaning your brushes, rollers, and other tools using the appropriate cleaning agents to remove any residual paint. Ensuring that brushes are thoroughly rinsed and dried helps to prevent hardened bristles and maintain their shape for future use.
- Remember to wipe down surfaces, such as countertops and floors, to remove any drips or spills promptly. Organizing your workspace by storing tools in designated areas after cleaning not only promotes efficiency for your next project but also prevents accidental damage or misplacement of essential items.